Spray Buffing a Floor
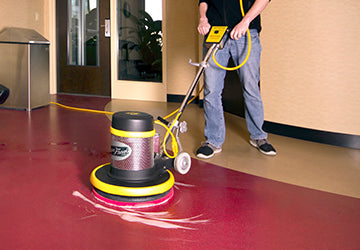
To remove scuff marks and maintain a shiny floor with a low speed buffer.
Prepping the Buffing Area -
Place the necessary caution/wet floor/restroom closed signs around the area that needs to be buffed. It is a good idea to rope off this area, or close down the specific aisles, as you do not want any foot traffic walking through your work area. Move all pieces of furniture and other obstacles that may hinder your buffing. Follow the dust mopping procedures to remove all debris, dirt, and large objects (i.e. pallet chips), from the cordoned off area. Next, follow the wet mopping procedures to ensure the floor is completely free of all dirt and debris, which will help you achieve the highest shine possible.
*Note: To achieve an even higher shine on your floor, you may need to take a look at our burnishing a commercial floor instructions.
Prepping Your Low Speed Buffer -
Place the correctly sized white pad that fits your floor buffer onto the required pad driver. Lean the floor buffer back and attach the pad driver to the main driver. Lower the machine back to its resting position.
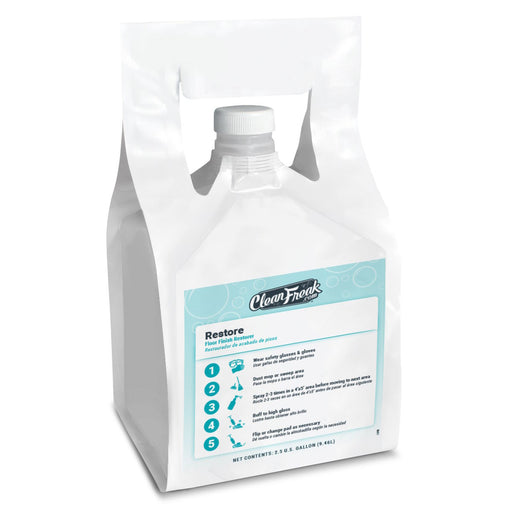
Apply your floor restoring solution. Something similar to our Floor Finish Restorer is ideal. There are several ways to accomplish this. Two of the most popular are: 1. To use a mop and bucket and mop the solution on before buffing. Or, 2. Fill a spray bottle with the buffing solution and water, to spray the solution down in front of your machine as you buff. You can also do a combination of both of these to make the job even easier.
CleanFreak® 'Restore' Floor Finish Restorer (2.5 Gallon FlexMax™ Pouch)
CleanFreak 'Restore' is a ready-to-use floor finish polishing and restoring product that can be used in low speed buffing or high speed burnishing ...
View full detailsBuffing with Your Machine -
Loosen the handle and adjust to a comfortable position. Lock handle into place. The handle should be resting slightly above your belt line. Take the power cord and uncoil it behind the machine. It is popular practice to sling the cord over one shoulder to have some control over it as you buff. Depress the safety start lever and pull up on the start-up handles with both hands. Make sure the butt of the handle is resting comfortably in your stomach, just above your belt line. Slowly start to rotate the machine from side to side (following the complete instruction found in the paragraph below). Do not fight the machine, just let it flow. If you run into trouble just release the hand levers, and the machine will shut down.
As you start to buff, you want to rotate the machine from side to side. To make it go left, slightly dip the handle, and the machine will flow left. Raise the handle slightly, and the machine will start to flow right. Your body should always stay perpendicular with the machine. When you hit about a 45° angle from where you started, you should then start buffing back towards the opposite direction. A 90° buffing angle is an ideal scope to be buffing with at any one time. You can maintain this motion going either in forward or reverse. As you are moving along, you'll want to have that spray bottle filled with a buffing solution hung on your hip. This will allow you to spray solution down as you're going. When you're just beginning, it is a good idea to work in small manageable areas like 5' x 5' squares. Once you've become a pro, you can move onto larger areas. Be extremely careful when buffing around walls or furniture, as one misstep could create a vast amount of damage.
Change pads often and use them on both sides. If a pad becomes bogged down with buffing solution, debris or wax, it will not continue to polish at a high rate. You'll want to continue to spray down solution and buff it out until the floor loses the haze it had and starts to shine. Overlapping each buffing pass can only help add to the shine of the floor, as well as ensure you don't miss any areas.
CleanFreak® 17" Heavy Duty Floor Buffer w/ Pad Driver
This CleanFreak low speed rotary floor machine was built to last! It is a 175 RPM, 17" multi-purpose floor buffer backed by a 5-year warranty on th...
View full detailsClean Up -
Dust mop, and then damp mop, or scrub the floor with an auto scrubber to pick up any dust resulting from the buffing operation. Take all pads and rinse them out thoroughly. Letting them soak in a sink full of water can help to break loose some of the debris that has built up in them from the buffing operation. Once clean, set the pads upright to dry. Remove all caution signs and return the moved obstacles back to their original positions. Rinse out all other equipment and accessories and hang them up to dry once they have been thoroughly cleaned.


 Protect & Save with SuperFreak.